Kenmore Bread Maker Manual: A Comprehensive Guide
This guide offers detailed instructions for Kenmore bread makers‚ covering models like 10029720210 and 100.12934‚ alongside Bluetooth pairing with Windows devices.

Understanding Your Kenmore Bread Maker

Your Kenmore bread maker is designed for convenient‚ homemade bread. Models vary‚ encompassing options like the 10029720210 and the 100.12934‚ each offering unique features. Familiarizing yourself with its capabilities is key to successful baking.
These machines automate the kneading‚ rising‚ and baking processes‚ simplifying bread making. Understanding the control panel‚ bread pan‚ and paddle functions is crucial. Many models feature pre-programmed settings for white‚ whole wheat‚ and sweet breads‚ offering versatility.
Furthermore‚ Kenmore bread makers can often connect via Bluetooth to Windows devices‚ enhancing user control and potentially offering access to additional recipes or features. Proper operation ensures delicious results and extends the life of your appliance.
Model Numbers and Variations
Kenmore bread makers come in diverse model numbers‚ each with slight variations in features and functionality. Common models include the 10029720210‚ a digital 1-2 pound capacity machine‚ and the 100.12934‚ often sold with a dedicated pan and paddle. Identifying your specific model is vital for accessing the correct manual and troubleshooting.
Variations may include differing pre-programmed settings‚ crust control options‚ and even Bluetooth connectivity for integration with Windows devices. Some models are part of the “Heavy Duty Series 70‚” like washer model 110.92273100‚ indicating robust construction.
Always refer to the model number printed on your appliance to ensure compatibility with replacement parts and support resources.
Locating the Manual Online
Finding your Kenmore bread maker manual online is often the quickest solution. Several websites archive PDF versions of user manuals‚ including resources for models like the KTR2300 and 100.12934. Searching directly for “Kenmore [model number] manual PDF” yields relevant results.
Websites like archive.org (identified as “ark:/13960/t4cn9w32bu”) host digitized manuals‚ offering access to older models. Manuals are also sometimes available through Sears’ website‚ as Kenmore is a Sears brand.
Ensure the manual matches your specific model number to avoid incorrect instructions. Downloaded PDFs can be saved for future reference‚ eliminating the need for a physical copy.
Safety Precautions
Prior to operating your Kenmore bread maker‚ carefully review all safety guidelines. The manual (specifically model 100;12934 CAUTION notice) emphasizes reading and understanding all instructions before use. Always ensure the appliance is properly grounded and used on a stable surface.
Avoid touching hot surfaces‚ like the bread pan and heating element‚ during or immediately after operation. Never immerse the appliance in water or other liquids. Keep the power cord away from hot surfaces to prevent damage.
Unplug the bread maker when not in use and before cleaning. Supervise children when the appliance is in operation. Do not operate the appliance with a damaged cord or plug.

Parts Identification

Your Kenmore bread maker consists of several key components. These include the main housing‚ control panel‚ bread pan‚ and kneading paddle. Model numbers like 10029720210 and 100.12934 share similar designs‚ though slight variations may exist.
The bread pan securely holds the ingredients during baking‚ while the kneading paddle mixes and kneads the dough. The control panel allows you to select desired settings and monitor the baking process. Familiarize yourself with the location of each part before first use.
Refer to the user manual (Kenmore_48487_Bread_Maker_User_Manual) for detailed diagrams illustrating each component’s placement and function. Understanding these parts is crucial for proper operation and maintenance.
Bread Pan and Paddle
The bread pan‚ essential for all Kenmore models (like 10029720210 and 100.12934)‚ is typically non-stick coated for easy loaf removal. Ensure it’s securely locked into place before starting any baking cycle. Regularly inspect for wear and tear‚ as damage can affect baking results.
The kneading paddle‚ often included with a spare‚ mixes ingredients and develops gluten. Proper paddle function is vital for dough consistency. If kneading issues arise (see Troubleshooting)‚ verify the paddle is correctly attached and undamaged.
Cleaning both the pan and paddle thoroughly after each use prevents residue buildup. Refer to the Kenmore_48487_Bread_Maker_User_Manual for specific cleaning instructions. Replacement parts are often available.
Control Panel Overview
Kenmore bread maker control panels‚ found on models like 100.12934 and others‚ feature digital displays and buttons for cycle selection‚ crust control‚ and timer settings. Common buttons include ‘Start‚’ ‘Stop‚’ ‘Menu‚’ and ‘Color’ for adjusting crust darkness.
Pre-programmed settings (White‚ Whole Wheat‚ Sweet – see Using Pre-Programmed Settings) simplify baking. The manual (Kenmore_48487_Bread_Maker_User_Manual) details each setting’s function. Some models may offer custom programming options for tailored recipes.
The timer function allows delayed starts‚ enabling fresh bread to be ready when desired. Familiarize yourself with the panel’s layout and button functions before operation. Refer to your specific model’s manual for detailed explanations.
Setting Up Your Bread Maker
Before first use‚ thoroughly clean the bread pan and paddle (see Cleaning and Maintenance). Ensure the appliance is placed on a stable‚ level surface away from water sources. Carefully insert the paddle into the paddle shaft within the bread pan‚ securing it firmly.
Add ingredients according to your chosen recipe (see Basic Bread Recipe). Always add ingredients in the order specified – typically liquids first‚ then dry ingredients‚ with yeast last. Securely place the bread pan into the bread maker.
Plug in the appliance and select your desired cycle using the control panel. Refer to the manual (Kenmore_48487_Bread_Maker_User_Manual) for specific cycle details. Double-check all settings before pressing ‘Start’.
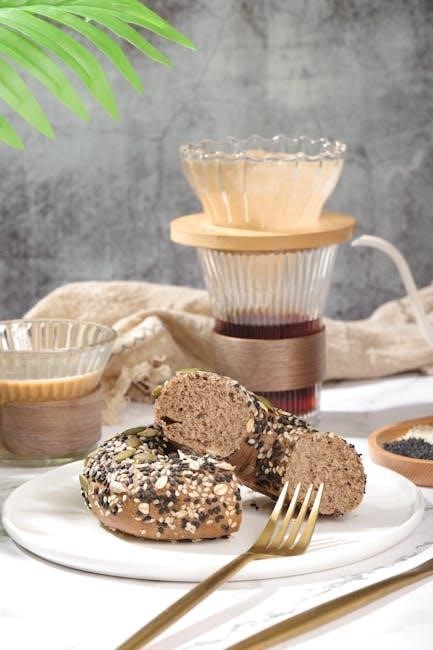
Basic Bread Recipe
This recipe provides a foundation for delicious homemade bread. You’ll need 1 ¼ cups warm water (105-115°F)‚ 2 ½ teaspoons active dry yeast‚ 1 tablespoon sugar‚ 1 ½ teaspoons salt‚ 2 tablespoons oil‚ and 3 ½ cups bread flour.
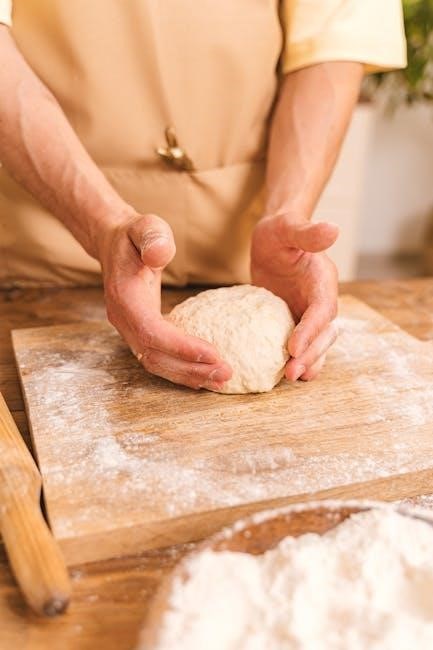
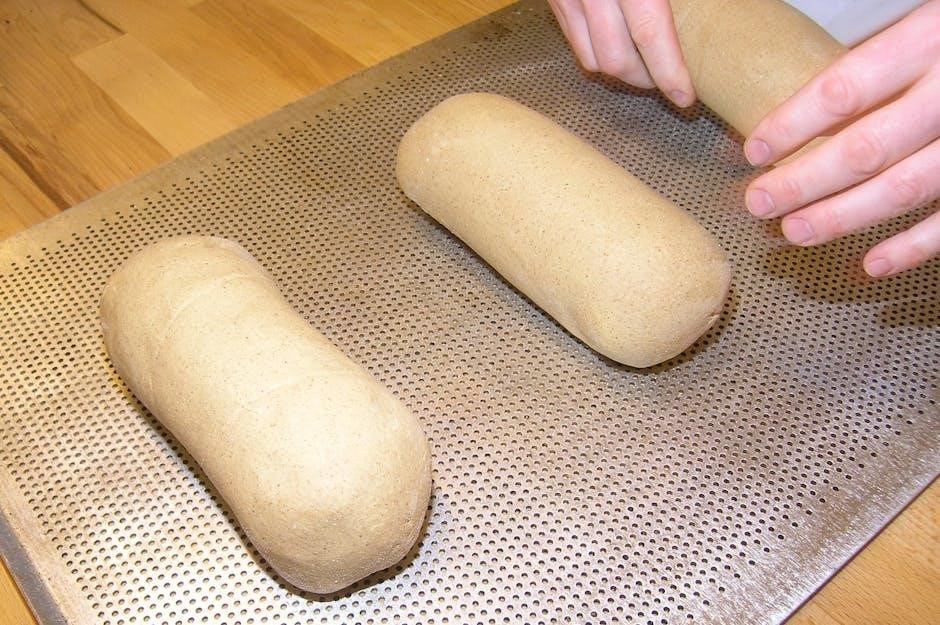
First‚ dissolve yeast and sugar in warm water; let stand for 5 minutes until foamy. Add oil and salt. Gradually add flour‚ mixing until a soft dough forms.
Pour the dough into the greased bread pan. Select the ‘Basic’ or ‘White Bread’ setting (see Using Pre-Programmed Settings) and a 1.5-pound loaf size. Choose your desired crust color. Press ‘Start’ and enjoy freshly baked bread! Refer to model-specific manuals like Kenmore ktr2300 for adjustments.
Using Pre-Programmed Settings
Kenmore bread makers feature convenient pre-programmed settings for various bread types. The ‘White Bread’ setting is ideal for classic loaves‚ while ‘Whole Wheat’ caters to denser‚ nuttier breads. For sweeter treats‚ utilize the ‘Sweet Bread’ setting‚ adjusting sugar levels accordingly.
To select a setting‚ simply press the corresponding button on the control panel. Most models (like 10029720210) allow you to customize loaf size (1lb‚ 1.5lb‚ 2lb) and crust color (light‚ medium‚ dark).
Consult your specific model’s manual (Kenmore_48487_Bread_Maker_User_Manual) for detailed instructions. Remember to add ingredients in the order specified in the recipe for optimal results. Experiment with settings to achieve your perfect loaf!
White Bread Setting
The White Bread setting on your Kenmore bread maker (models like 100.12934) is designed for standard loaves using all-purpose or bread flour. This cycle typically includes kneading‚ rising‚ and baking phases‚ automatically managed by the machine.
For best results‚ use a recipe specifically formulated for a bread maker‚ ensuring accurate ingredient measurements. Generally‚ this setting works well with recipes containing 1 to 2 cups of flour‚ depending on the desired loaf size. Adjust the crust color to your preference – light‚ medium‚ or dark – using the control panel.
Refer to your Kenmore manual (Kenmore_48487_Bread_Maker_User_Manual) for specific timing details and troubleshooting tips related to this setting. Ensure the bread pan and paddle are securely in place before starting the cycle;
Whole Wheat Setting
The Whole Wheat setting on your Kenmore bread maker (models such as 10029720210) is specifically calibrated for loaves made with whole wheat flour‚ which requires a longer kneading and rising time due to its density. This setting ensures proper gluten development for a well-structured loaf.
When using this setting‚ it’s often beneficial to combine whole wheat flour with a portion of all-purpose flour to improve texture. Recipes designed for bread makers are recommended for consistent results. Adjust the liquid content as needed‚ as whole wheat absorbs more moisture.
Consult your Kenmore manual (Kenmore_48487_Bread_Maker_User_Manual) for precise cycle times and potential adjustments. Remember to select your desired crust color before initiating the cycle. Proper ingredient order is crucial for optimal performance.
Sweet Bread Setting
The Sweet Bread setting on your Kenmore bread maker (like model 100.12934) is designed for enriched doughs containing higher sugar and fat content‚ crucial for recipes like brioche or cinnamon swirl bread. This setting incorporates a slower rise to allow for optimal flavor development and a softer crumb.
When utilizing this setting‚ ensure ingredients are measured accurately‚ as sugar and fat can impact gluten formation. It’s recommended to use instant yeast for consistent results. Monitor the dough during the kneading phase; it should be smooth and elastic.
Refer to your Kenmore manual (Kenmore_48487_Bread_Maker_User_Manual) for specific cycle durations and potential adjustments based on your recipe. Select your preferred crust color before starting. Remember ingredient order matters for best results!

Customizing Your Bread
Kenmore bread makers offer flexibility beyond pre-programmed settings. Customization allows you to tailor loaves to your exact preferences‚ experimenting with flavors and textures. Adjusting the crust color is simple – select from light‚ medium‚ or dark using the control panel. This impacts baking time and the final loaf’s appearance.
Adding ingredients like fruits‚ nuts‚ or seeds enhances flavor and texture. Introduce these during the second kneading cycle‚ signaled by the machine’s beep‚ ensuring even distribution. Avoid overloading the pan‚ as this can hinder rising.

Consult your Kenmore manual (like Kenmore_48487_Bread_Maker_User_Manual) for guidance on ingredient quantities and timing. Remember‚ experimentation is key to perfecting your signature bread!
Adjusting Crust Color
The crust color setting on your Kenmore bread maker directly influences the baking time and the final appearance of your loaf. Typically‚ options include light‚ medium‚ and dark crusts. A lighter crust results in a shorter baking cycle and a softer exterior‚ ideal for sandwiches.
Selecting a medium crust provides a balanced color and texture‚ suitable for everyday bread. A dark crust extends the baking time‚ creating a robust‚ deeply browned exterior – perfect for artisan-style loaves.
Refer to your specific Kenmore model’s manual (e.g.‚ Kenmore_48487_Bread_Maker_User_Manual) for precise details on how to adjust this setting using the control panel. Experiment to discover your preferred level of crispness!
Adding Ingredients (Fruits‚ Nuts‚ Seeds)
Enhance your homemade bread with delightful additions like fruits‚ nuts‚ and seeds! Most Kenmore bread maker models feature a dedicated dispenser for these ingredients‚ ensuring they’re added at the optimal time during the kneading process.
For models without a dispenser‚ a gentle sprinkle over the dough during the initial kneading cycle is recommended. Avoid adding large quantities at once‚ as this can disrupt the rising process.
Consider using chopped fruits (raisins‚ cranberries)‚ chopped nuts (walnuts‚ pecans)‚ or seeds (sunflower‚ flax) for added flavor and texture. Refer to your Kenmore manual (like 100.12934) for specific ingredient quantity guidelines to achieve the best results.
Troubleshooting Common Issues
Encountering problems with your Kenmore bread maker? Common issues include kneading difficulties and bread failing to rise. For kneading problems‚ ensure ingredients are added in the correct order and the paddle is securely attached. Check the dough consistency – it should form a smooth‚ elastic ball.
If your bread isn’t rising‚ verify the yeast is fresh and properly activated. Temperature plays a crucial role; ensure the kitchen isn’t too cold. Refer to your model’s manual (e.g.‚ 10029720210) for specific troubleshooting steps.
Sometimes‚ a power cycle or resetting the machine can resolve minor glitches. Don’t hesitate to consult online resources or Kenmore support for more complex issues.
Kneading Problems
If your Kenmore bread maker isn’t kneading properly‚ several factors could be at play. First‚ confirm ingredients were added in the correct sequence‚ as specified in your recipe and the manual (models like 100.12934 often detail this). Ensure the kneading paddle is firmly secured to the shaft within the bread pan.
Dough consistency is vital; it should form a smooth‚ elastic ball. If too dry‚ add liquid‚ one tablespoon at a time. If too wet‚ add flour‚ similarly in small increments. Overloading the machine can also hinder kneading.
Check for obstructions around the paddle. A properly functioning machine‚ like the KTR2300‚ should knead efficiently.
Bread Not Rising
If your bread isn’t rising in your Kenmore bread maker (models such as 10029720210)‚ the most common culprit is yeast. Ensure your yeast is fresh and hasn’t expired; old yeast loses its potency. Verify the liquid used to activate the yeast wasn’t too hot‚ as this can kill it‚ or too cold‚ hindering activation.
Ambient temperature also plays a role. A cold kitchen can slow down the rising process. Consider a warmer location. Check the amount of sugar in your recipe; yeast needs sugar to feed on.
Finally‚ ensure the lid is sealed correctly during the rising phase‚ preventing heat and moisture loss. Refer to your manual for specific troubleshooting steps.
Cleaning and Maintenance
Regular cleaning extends the life of your Kenmore bread maker (models like 100.12934). Always unplug the appliance before cleaning. The bread pan and kneading paddle are typically non-stick and can be washed with warm‚ soapy water. Avoid abrasive cleaners that could damage the coating.
The exterior of the machine can be wiped down with a damp cloth. Never immerse the bread maker housing in water. Ensure all parts are thoroughly dry before reassembling.
Periodically check the kneading paddle for wear and tear. Refer to your specific model’s manual for detailed cleaning instructions and recommended maintenance schedules to ensure optimal performance.
Storing Your Bread Maker
When not in use‚ ensure your Kenmore bread maker (including models like 10029720210) is completely cool‚ clean‚ and dry. Store it in a cool‚ dry place‚ away from direct sunlight and moisture. It’s best to store it in its original packaging if available‚ or a similar protective container.
Avoid storing it where it could be easily knocked over or damaged. Keep the power cord neatly coiled and stored with the appliance; Proper storage helps maintain the functionality and extends the lifespan of your bread maker.
Remember to keep the manual accessible for future reference‚ especially regarding Bluetooth connectivity with Windows devices.
Warranty Information
Kenmore bread maker warranties‚ applicable to models such as 10029720210 and 100.12934‚ typically cover defects in materials and workmanship for a specified period from the date of purchase. The duration varies‚ so retain your proof of purchase.
The warranty generally doesn’t cover damage resulting from misuse‚ accidents‚ or unauthorized repairs. It also may not cover wear and tear from normal use. Refer to your specific model’s warranty documentation for complete details.
For warranty claims‚ contact Sears or the retailer where you purchased the bread maker. Keep the model number handy. This warranty does not affect your rights regarding Bluetooth device pairing with Windows.
Frequently Asked Questions (FAQ)
Q: Can I pair my Kenmore bread maker with a Windows device? A: While the bread maker itself doesn’t have Bluetooth‚ Windows devices can pair with various Bluetooth peripherals. This is unrelated to bread maker functionality.
Q: My bread maker isn’t kneading properly. What should I do? A: Ensure ingredients are added in the correct order and the paddle is securely attached. Check for obstructions. Refer to the troubleshooting section.
Q: Where can I find a PDF of the manual for model KTR2300? A: Online searches can locate PDF versions of Kenmore bread maker manuals‚ including the KTR2300‚ for reference and guidance.
Bluetooth Connectivity (Related to Windows Devices)
Important Note: Kenmore bread makers do not directly utilize Bluetooth technology. This section addresses Bluetooth functionality within Windows devices‚ as it relates to potential peripheral connections.
Windows supports pairing with a wide array of Bluetooth devices – keyboards‚ mice‚ phones‚ speakers‚ printers‚ and more. To connect‚ ensure your Windows device has Bluetooth enabled (or a USB adapter is installed). Verify Bluetooth is active in Windows settings; a highlighted tile indicates it’s on; If experiencing connection issues‚ toggling Bluetooth off and on can often resolve problems by resetting the connection. For Ukrainian users‚ similar steps apply to enable/disable Bluetooth within Windows.